Writing · Assembly
I Built ASCII Dodge to Find Out Where the Bytes Go
Building a game in assembly to understand registers, memory addresses, and where the bytes actually go.
Writing code in high level languages hides a lot of the stuff that you don't want to worry about in day to day programming, no one wants to know where their byte is at or how different values are stored in the registers and how are we reading it, but I had my questions. Writing a loop is easy when you have great syntax but it was quite different in assembly, from having to know where your byte went, being confused between the memory address and what the memory address holds, visually looking at a piece of data and it not being stored in memory that way and same register having different names for different sections of the memory. I don't recommend trying to write something like this, but it was an eye opening process as it shows how much we take for granted while using high level languages.
Starting with “hello, world!”
Ok lets start with how you would print a “hello, world!” in assembly, you would need to change the values of four registers.
- Step 1: Value of
RAXset to 1 first, why 1? Because 1 is Linux's write syscall. - Step 2: Value of
RDIset to 1, standard output. Normally meaning we have selected the terminal for output (it can be redirected elsewhere, haven't looked at that though). - Step 3: get the first address of the message which we have to store already in the data section and place it in
RSI. - Step 4: get the number of bytes we need to write from the first address and place it in
RDX. - Step 5: finally the syscall and the message gets printed!!!
From a grid to a line of memory
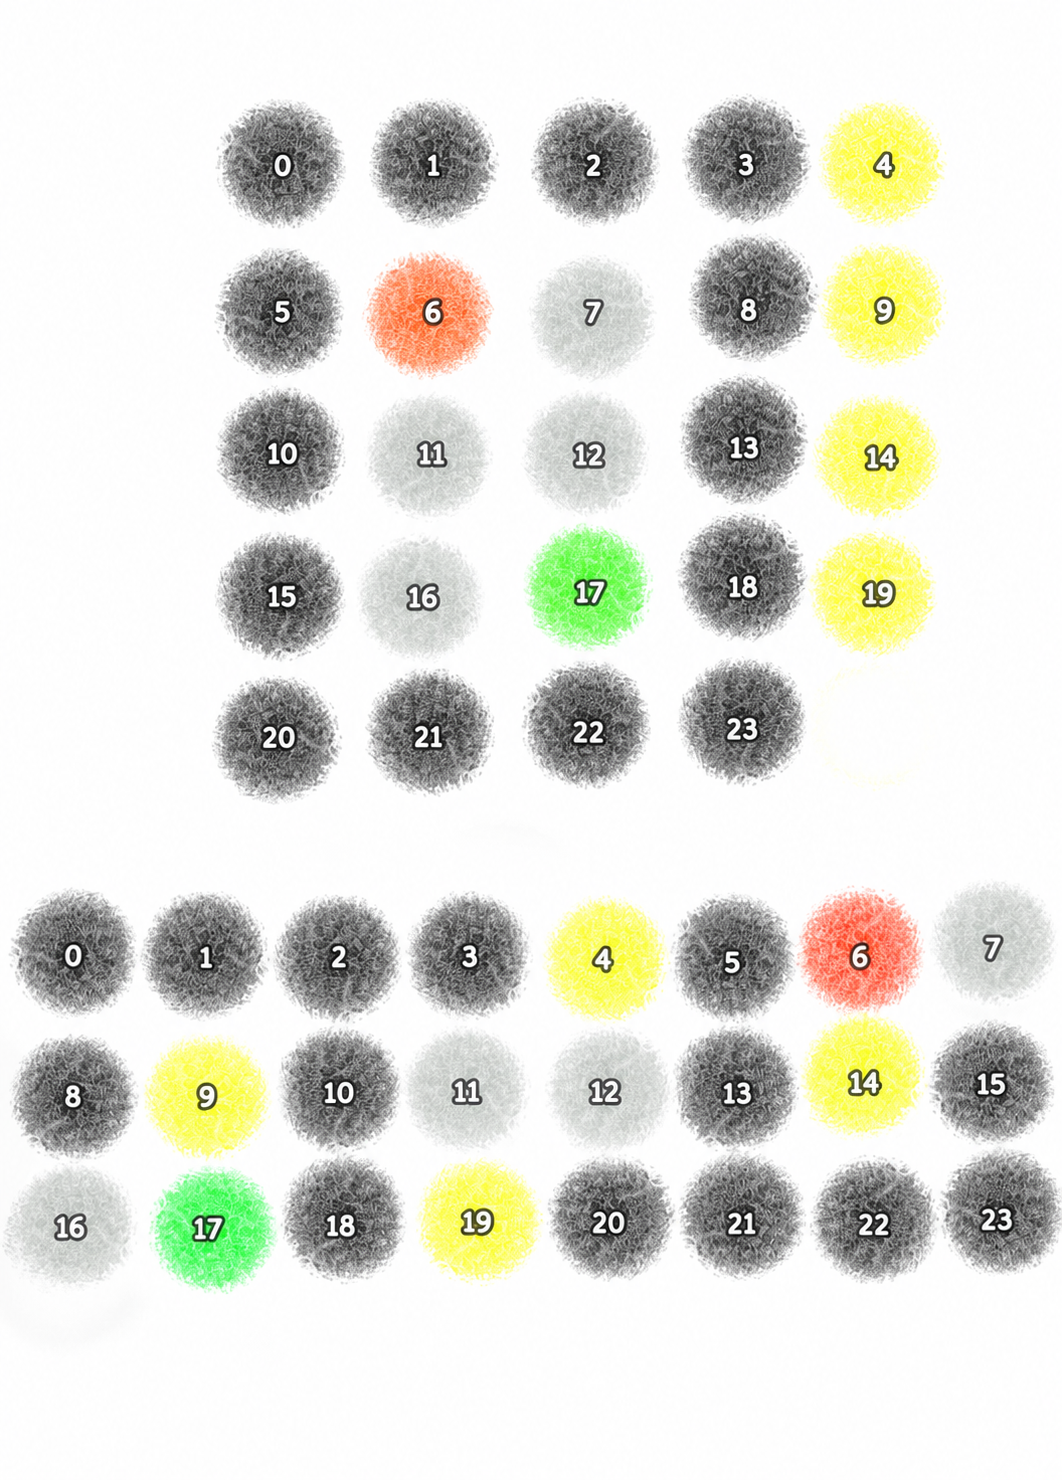
Ok so what is this abstract art, the first square looking part is how you would normally imagine a game map to look like, and the bottom rectangle one is how it stays in memory. The rectangular part should actually look like a long continuous line but it didn't fit in the picture so imagine it being a continuous line. The colors represent the following:
- Black → the walls of the level
- Yellow → new line character something of a
\nyou normally see - Red → the obstacle
- Grey → empty space
- Green → player
And our job in the game is to make the different objects move, the player can go right and left and the obstacle moves downwards. But the board is in a straight line, meaning in the terminal we see rows but the memory stores them one after another. So the player movement of right and left is a simple replace character with the byte to its right if not a wall when pressed right or replace the character with the byte to its left if not a wall when pressed left.
You can take reference from the picture the green blob is the player and its index is 14. Now we compare the player_position + 1 address and it is a wall, we won't be able to go that way because that's a wall but going left can be done. In pseudo code it would look like this:
If command = move_right:
    If player_position + 1 ≠ wall:
        player_position += 1
If command = move_left:
    If player_position - 1 ≠ wall:
        player_position -= 1
But it was a completely different story for the obstacle coming down. There is no up or down in a straight line, going up or down is like teleportation. Looking closely at the image if the obstacle (the red blob) wants to go down one row, it needs to move from index 6 to 11 so the simple math is obstacle_position + 7, but that ain't it it is more like obstacle_position + (row_stride × rows_to_move) and row_stride = visible_columns + line_ending_bytes. In pseudo code it would look like this:
If obstacle reaches bottom:
    reset obstacle to top
Else:
    obstacle_position += row_stride
This part is not an assembly quirk but more of a how memory is stored in a very low level, which I found really cool.
Reading one key at a time
In a game you take inputs from the player because we want them involved in what is happening but in assembly there is no “the player pressed A” event. We need to on our own tell the program to grab the things from the standard input and a logic to do or not do looking at what we have in the input. So what does that mean, just like writing something in the terminal, getting something from the terminal is also quite long.
- Step 1: set
RAXto 0, 0 is the syscall for read. - Step 2: set
RDIto 0, select the standard input which is the terminal and can be redirected. - Step 3:
VMINis set to 0 so that read doesn't have to return anything andVTIMEis set to 1 so the read syscall waits for a tenth of a second only. This makes the read call non blocking the game loop can continue without the users input also. - Step 4: we put the one-byte input buffer in
RSIwhere the received byte will stay. - Step 5:
RDXset to 1, so the system knows that we have to read only one byte. - Step 6: execute the syscall. If
RAXhas 1 then we have received a byte if 0 then the user didn't input anything.
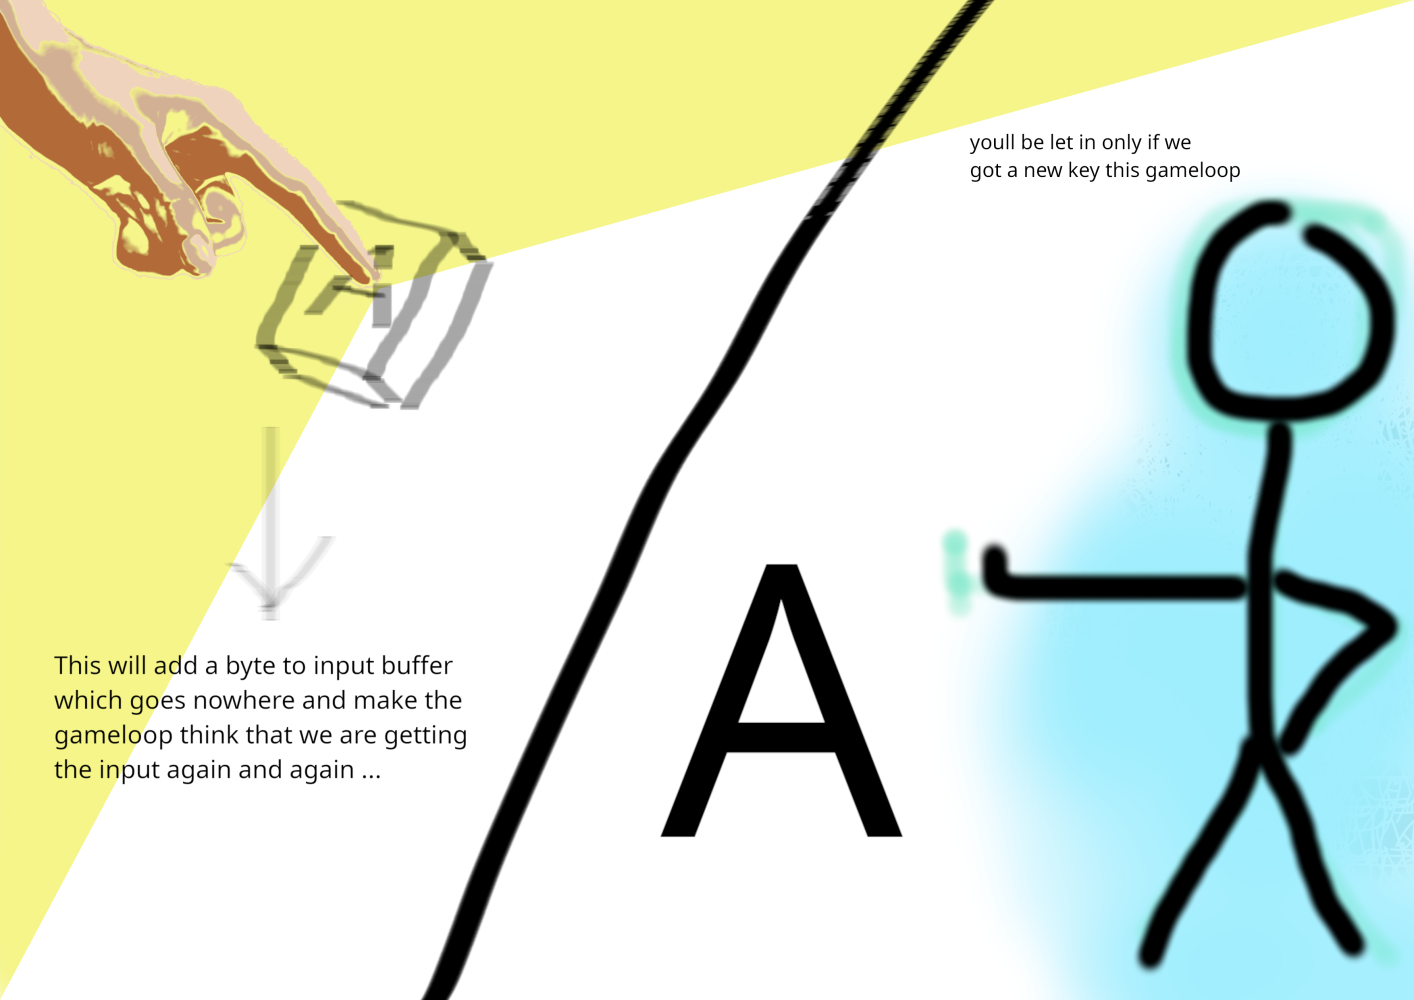
One confusing bug showed up in the input loop: sometimes the game acted on a key I hadn’t just pressed. The cause was that a timed-out read returned 0, but the input buffer still held the byte from the previous read. The old key was still in memory, it just wasn't a new input. Checking RAX, which holds the return value from read, solved it: I only handle the key when RAX says a byte was actually read.
Letting the obstacle fall
Now we have the basics: A and D move the player left and right, while the obstacle falls. When it reaches the last row, it re-spawns at the top. But if it always started and ended in the same place, it wouldn’t be much of a game, would it?
Linux syscall 318 gives us a random byte, and I’m now comfortable enough with assembly to store it in random_byte. That byte can hold any value from 0 to 255, while the game has only 9 columns where the obstacle can spawn. The blob diagram shows just 2 columns for simplicity, so let’s use that as an example: divide the random number by 2 and use the remainder, which will be 0 or 1. Add 1, and the result is either 1 or 2—the obstacle can spawn in either column first or second.
In the actual game, the code uses 9 instead of 2, giving a remainder from 0 to 8. Adding 1 shifts that to columns 1 through 9.
That completes the basic game loop. Collision detection is simple: if obstacle_position equals player_position, it’s game over. The code uses cmp for that, along with plenty of other comparisons.
What I took away
And honestly, that was enough assembly for me. I was curious about where my bytes went and what actually happened, but I got humbled and I wouldn’t recommend jumping into such a simple looking project like this without being ready to look things up constantly and getting georged. Writing around 200 lines of assembly made me look at high-level languages with respect. It also makes you think, do you need to know what is even going on when LLMs just turn your plain explainers into programs and handle everything.